
This article is part of Rootstock’s series “Building DeFi on Bitcoin” exploring different solutions and integrations on the Rootstock blockchain that enable scaling Bitcoin, bringing DeFi capabilities to the world’s first blockchain.
Gelato, the famous rollup-as-a-service platform, has recently announced its integration with Rootstock. Through Gelato middleware services, Rootstock devs can now easily automate workflows & offer gasless transactions in their dApps.
In this article, we explore a step-by-step guide to getting started with Gelato’s web3 functions.
Getting started with Gelato web3 functions
Step 1: Whitelist your address
Reach out to the Gelato team on Discord to get your address whitelisted.
Step 2: Deploy smart contracts
Deploy the smart contracts you want to automate.
Step 3: Create a function
Visit Gelato Function Creation to start setting up your function.
Choosing a Trigger
Trigger Types
- Time Interval: Executes tasks at regular intervals, such as every 10 minutes.
- Cron Expressions: Schedules tasks for specific times, e.g., “every Tuesday at 3 PM”.
- On-Chain Event: Triggers tasks based on specific blockchain events.
- Every Block: Executes tasks with each new blockchain block.
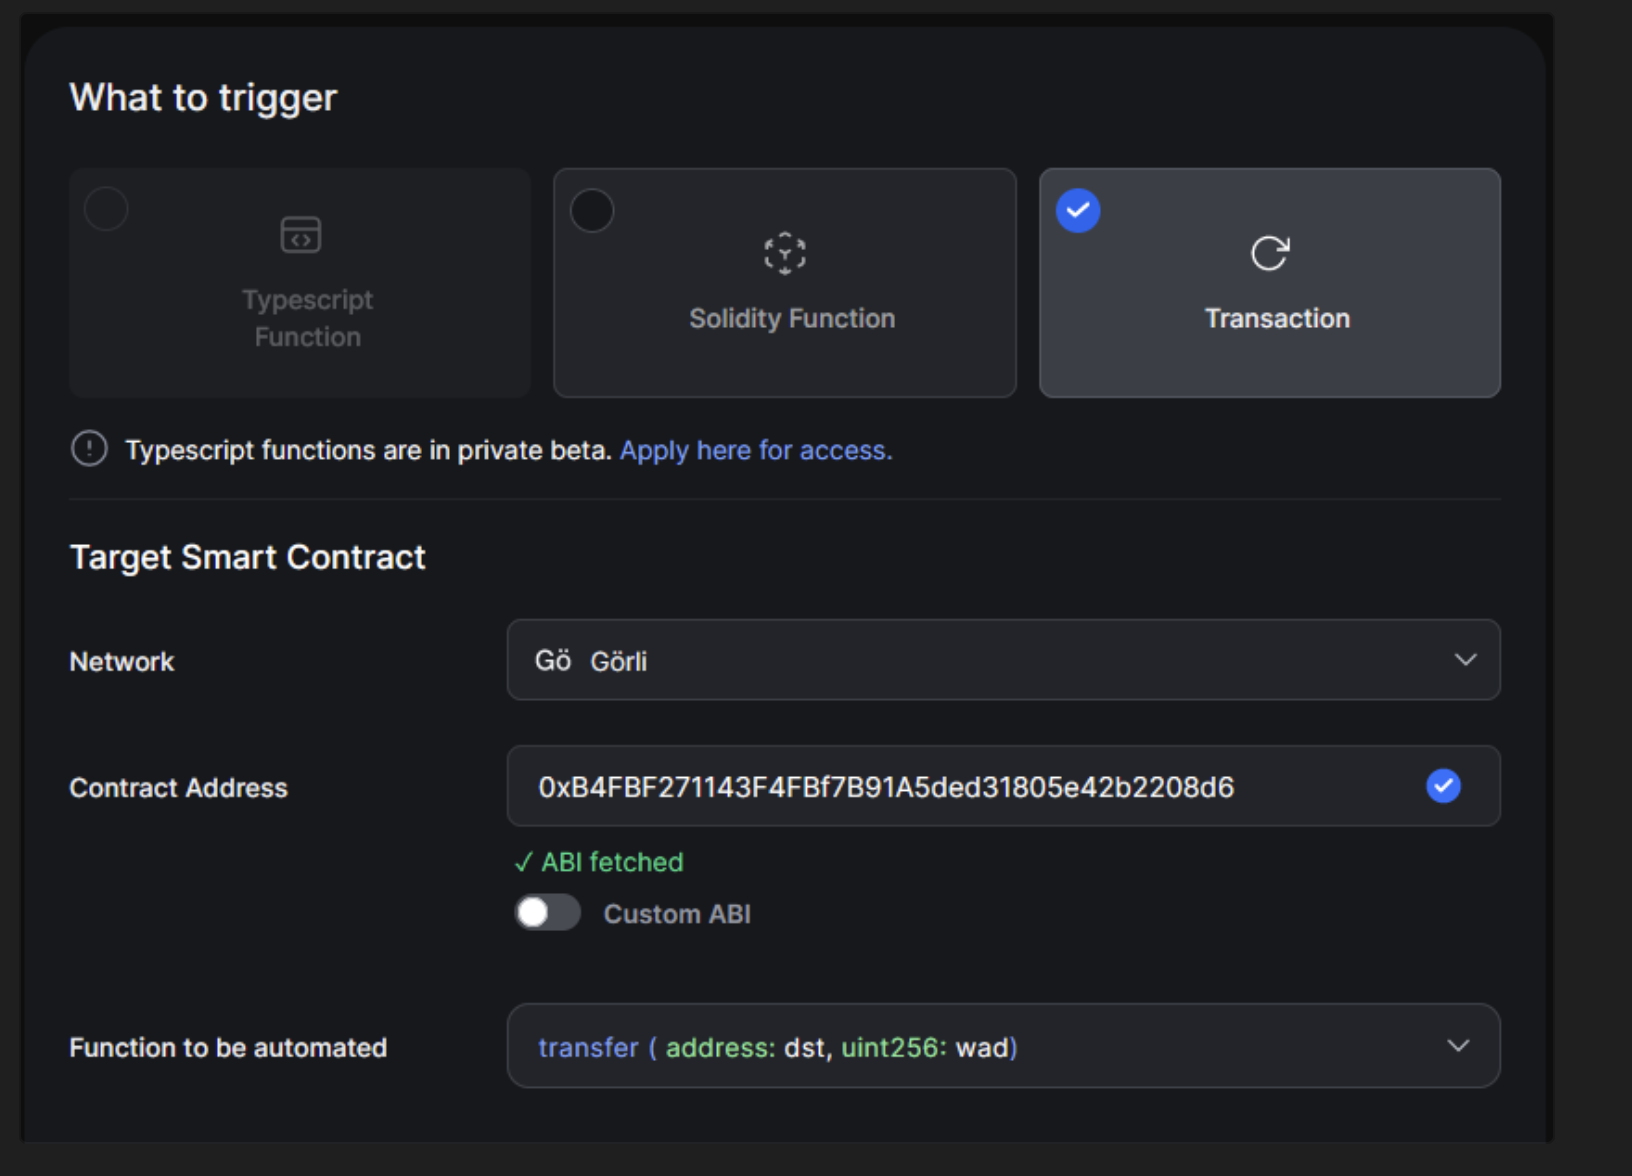
Select What to Trigger
- Typrscript Functions: Allows developers to execute on-chain transactions based on onchain conditions and off-chain data (APIs, subgraphs, etc.) and computations.
- Solidity Functions: Allows developers to execute on-chain transactions based on on-chain conditions
- Transactions:
Typescript Functions
Check the Quickstart Guide and Video Tutorial on how to write, test, deploy & run Typescript functions
Creating Typescript Function Task
- Enter Typescript IPFS CID: After creating your Typescript function, enter the IPFS CID returned.
- If your Typescript function needs secret variables or API keys, securely enter them in the Task Secrets section. For every secret:
- Key: Define each secret’s name (e.g., “API_KEY”).
- Value: Enter the associated secret value.
- Select the Network: Choose “rootstock” as the network for deployment.
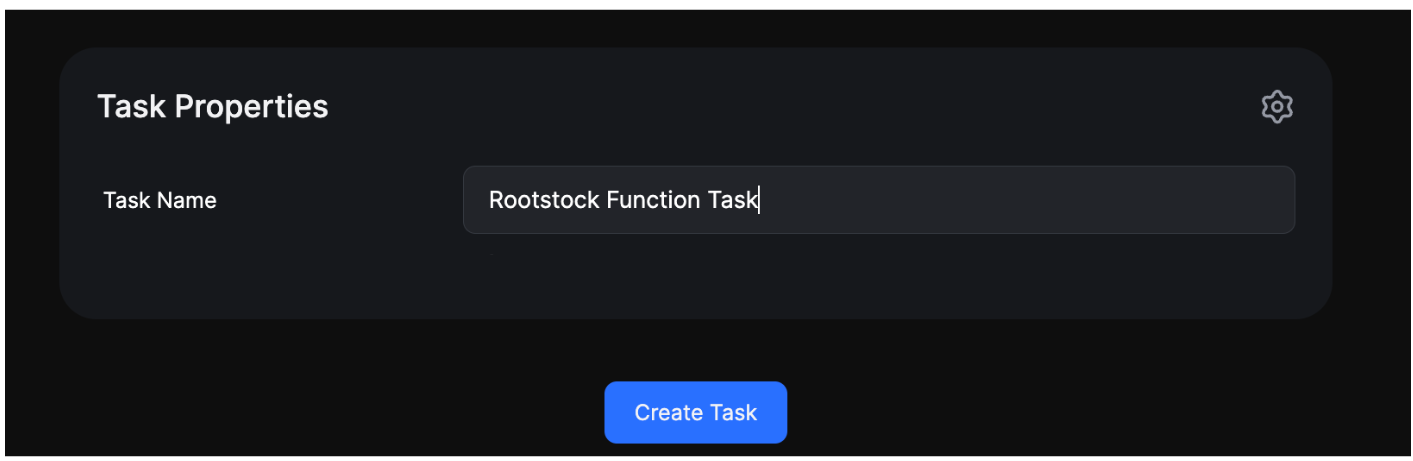
Finalize Task Creation
Enter the task name in the Task properties and click Create Task to finalize.
Solidity Functions
Check the Quickstart Guide and Video Tutorial on how to write, test, deploy & run Typescript functions
Creating Solidity Function Task
- Select the Network: Choose “rootstock” as the network for deployment.
- Enter the Ethereum Address: Enter the Ethereum address of your deployed Solidity contract.
- Select Checker Function: From the Checker Function dropdown, choose the specific function you want as a condition checker.
- Specify Target Contract: Enter the contract where the automated function call will be sent.
Transactions
Check the Quickstart Guide and Video Tutorial on how to write, test, deploy & run Transactions.
- No Custom Code Required: For initiating transaction tasks, there’s no need for you to write code. Simply set your desired trigger and move forward.
Final Step
- Create Task: Finally, click the “Create Task” button. It’s that simple!
About Gelato
Gelato is a web3 cloud platform enabling developers to create advanced smart contracts that are automated, gas-efficient, and capable of operating off-chain. Top web3 projects depend on Gelato to facilitate the execution of millions of transactions throughout DeFi, NFT, and gaming ecosystems. So if you’ve ever used AAVE, Sushiswap, Abracadabra, MakerDAO, and Beefy Finance then you’ve unknowingly interacted with Gelato’s tech.
Website | X | Discord | Telegram
Building on Bitcoin?
If you’re getting started with building on Bitcoin with Rootstock, you’ll find these guides helpful:
- Have a dApp on Ethereum? Port your EVM dApp to Rootstock with this step-by-step guide.
- You’ll also need RBTC, Rootstock’s native token. Don’t have RBTC? There are numerous ways to get it, read this comprehensive article.
- Is your current wallet compatible with Rootstock? Explore this comprehensive list of Rootstock wallets.
Enjoying the content for developers? Head to the Rootstock dev portal for comprehensive guides.


